Every spring, I watch the gardening section of my local hardware store fill up with seed-starting kits, plastic trays, and little peat pellets — all with pretty price tags attached. And every spring, I walk right past them, because honestly? My kitchen trash is already doing a better job.
Before you spend a single dollar on seed-starting supplies, take a good look around your house. You might be shocked at how many perfect little seed pots are hiding in plain sight. Here’s a rundown of my favorites.
Toilet Paper and Paper Towel Rolls
Let’s start with the classic. Cardboard tubes are basically free seed pots, and the best part is you can plant the whole thing directly into the ground — the cardboard breaks down on its own. Just fold the bottom of the tube into a little square base (like you’re wrapping a gift), fill it with seed-starting mix, and you’re good to go. Stand them up in a tray or baking dish so they stay upright, and water from the bottom. Easy, cheap, and zero plastic waste.
Egg Cartons
Paper egg cartons are another fan favorite, and for good reason. The individual cells are just the right size for most vegetable seeds — tomatoes, peppers, basil, you name it. When your seedlings are ready to transplant, you can cut the sections apart and plant them straight into the soil. Paper cartons will decompose; just avoid foam or plastic ones since those need to be removed first. Bonus tip: use the lid as a watering tray underneath.
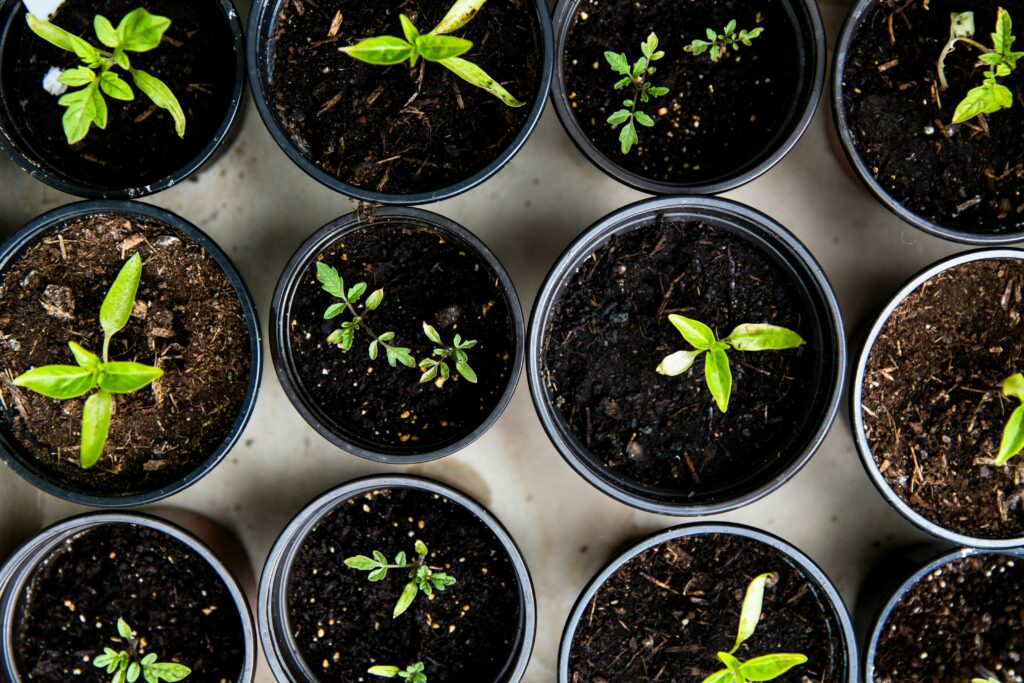
Yogurt Cups and Sour Cream Containers
These are workhorses. Rinse them out, poke a few drainage holes in the bottom with a skewer or nail, and you’ve got a perfectly serviceable seed pot. They’re a bit bigger than egg carton cells, which makes them great for seedlings you want to grow on a little longer before transplanting — think cucumbers or squash. Label them with a bit of masking tape and a marker, because trust me, you will not remember which one is which.
Newspaper Pots
Okay, this one takes about 45 seconds to make and feels very satisfying. Fold a few sheets of newspaper around a small jar or a tin can to form a cup shape, and you’ve got a biodegradable pot that will hold together long enough to get your seedlings off to a good start. There are plenty of tutorials online showing different folding techniques, but honestly it doesn’t have to be perfect — seeds aren’t picky about aesthetics. Like cardboard tubes, newspaper pots can go straight in the ground at planting time.
Citrus Peels
This one feels a little fancy but it’s completely practical. If you’re juicing oranges, lemons, or grapefruits, save the halved-out peels. Fill them with soil, add a seed or two, and you’ve got a tiny biodegradable pot that even adds a little organic material to your garden when you plant it out. They’re small, so they’re best for things like herbs, lettuce, or flowers rather than big vegetable seedlings. They’ll also dry out a bit faster than other containers, so keep an eye on moisture.
Plastic Bottles
A two-liter or even a smaller water bottle can pull double duty as a seed-starting greenhouse. Cut the bottom third off, fill it with soil and seeds, then place the top portion (cap off) back over it like a little dome. The bottle creates its own mini humid environment that speeds up germination beautifully. Once your seeds sprout and need more air, just remove the top. You can also just use the bottom half on its own as a pot — punch some drainage holes and away you go.
Takeout Containers and Deli Tubs
Those clear plastic clamshell containers from the deli counter or your last takeout order? Perfect humidity domes. Fill the bottom with seed-starting mix, plant your seeds, and close the lid. Set it somewhere warm and check it daily. Once you see sprouts, crack the lid to let them breathe. Shallow deli containers also make great mini seed trays for starting lettuce and greens.
Ice Cube Trays
Got an old ice cube tray lurking at the back of the freezer? Give it a new life in the garden. The individual compartments are great for starting small seeds like herbs, lettuce, or flowers. They won’t have drainage holes, so be careful not to overwater, and transplant your seedlings into larger pots or straight to the garden bed as soon as they’re big enough.
A Few Tips to Keep in Mind
Whatever containers you end up using, a few basics will set you up for success. Make sure there’s somewhere for water to drain — soggy roots are the enemy of happy seedlings, so poke holes in plastic containers and embrace the naturally permeable nature of cardboard and paper options. Use a good seed-starting mix rather than garden soil, which tends to compact too much in small containers. And keep your containers somewhere warm and bright once those seeds get going.
The other thing worth mentioning: label everything. A tiny tomato seedling looks identical to a tiny pepper seedling at two weeks old. Masking tape and a marker, a popsicle stick, a piece of foil with the name scratched in — whatever works for you. You’ll thank yourself later.
The truth is, seeds don’t know (or care) whether they’re sprouting in a fancy plastic tray or half a yogurt container. They just need warmth, moisture, and a little patience — and you’ve already got all of that. So before the spring seed-starting season kicks off, have a rummage through your recycling and see what you’re working with. Your wallet and your garden will both be happy you did.